Drawing is the bedrock foundation for every artist, so if you're just starting out on your art journey, then you've come to the right place!
Why Drawing is Important for Beginners:
Too often, beginners will jump right into watercolor or oil without even considering drawing simply because it lacks that exciting color factor. On the contrary, most if not all professional art schools and ateliers begin with at least a year of drawing before proceeding to other mediums.
Without these fundamental drawing principles, art can become frustrating and confusing, so make sure that you understand these key drawing concepts before moving on and make life easier on yourself so that you don't get bogged down with artist's block.
In this article, we will discuss how to draw like the pros with these 5 basic drawing tips.
5 Basic Drawing Tips
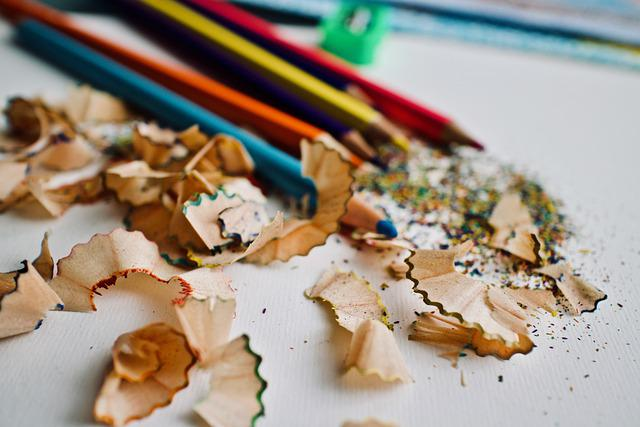
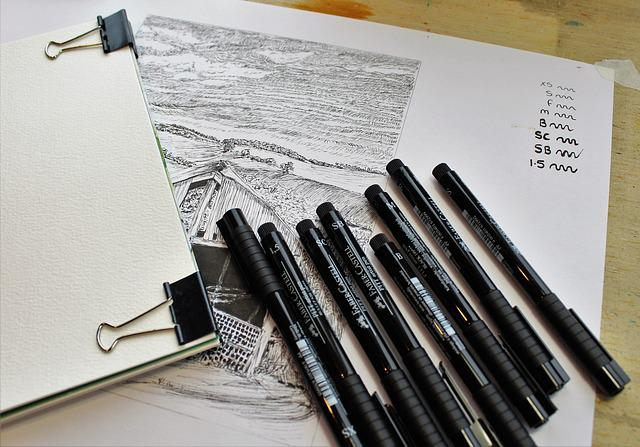
Tip 1: Know Your Tools
First off, it's important to have the right drawing materials and supplies. No one likes doing double work just because they had to settle for some cheap, knock-off graphite pencils from a dollar store.
Pencils:
Make sure that your pencils have good reviews and come from a reputable art company. Don't settle for graphite that has a wax-like look and feel. I would recommend starting off with at least 4 different lead densities: HB, B, 2B, and 4B or 6B will work great, although you can buy complete pencil sets that range from H to 8B if you really want to go all out. (A manual pencil sharpener is also very nice to have on hand since quality lead pencils are soft and tend to break in automatic sharpeners).
Paper:
Next, you need some sort of drawing pad of paper. While standard 8.5x11" printer paper works fine, I personally like to have all my drawings and sketches in the same place. Paper thickness can range from sketchbook thin to Bristol thick, and everything in-between. If you're just starting out, I recommend regular drawing paper; however, if you want to work on a finished, frameable piece, consider investing in some thick Bristol paper that will allow you to erase without scrubbing holes through the page and give you a nice firm surface that won't bend or wrinkle as easily.
Erasers:
Lastly, it's always nice to have some erasers on hand in case you run into some mistakes. However, BEWARE! Erasers are far too often used more than the actual pencil. They are only there to help you draw–not undo all your hard work! A standard white eraser, kneadable eraser, (and my personal favorite), mechanical eraser can be great tools for not only erasing, but also blending, texture, and in the case of a kneadable eraser, can be a fun distraction to play with when your teacher is rattling on a lecture.
To find our full list of recommended art supplies, visit our page here.
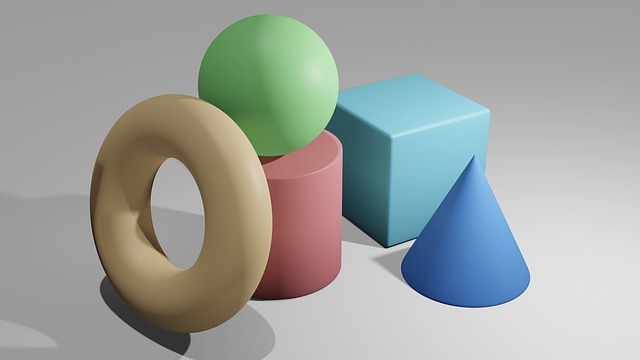
Tip 2: Start with Simple Shapes
I have found over my years of drawing and teaching, that art is more about training your eyes to see in a way they didn't see previously. Simple shapes are a perfect example of this.
Before you ever set your pencil on the paper, it's important to study your subject, whether it be a photo or model from life. After you have the general outlay of the subject in your mind, close your eyes and try to picture your subject–only this time made out of basic shapes.
Simple shapes are what we commonly call 2D and 3D shapes: Circle/Sphere, Square/Cube, Rectangle/Cylinder, Triangle/Pyramid, and Triangle/Cone.
Everything in creation can be broken down into basic shapes, and it will make your drawing efforts soooo much easier if you can break objects down into their basic forms.
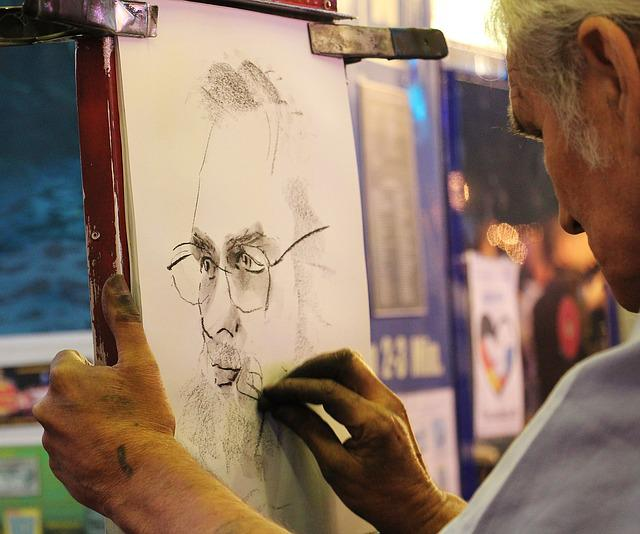
Tip 3: Draw from Life
Before I talk about drawing from life, I just want to say that it is OK to draw from pictures. It is a LOT more difficult to have to translate a model in your head from 3D into 2D and then draw it than it is to have that part already done for you. If you are just starting out, I would encourage you to practice drawing from photos or print-outs first before moving to drawing from life.
That said, if you want to get really good at drawing and shading, draw from life. It's what all the masters do, and you should too. You will learn so much simply from observing how light interacts, how edges soften, and how your shadows keep changing depending on the time of day. Your first attempt is not going to look like something from Rockwell, but don't give up! Keep your old drawings so that you can track your progress. Try to put in at least ten minutes a day. Consistency will always get you farther than one week of non-stop art followed by complete burn-out and exhaustion.
Whenever possible, try to draw from life. Not only will this help improve your observational skills, but it will also give you a better understanding of how people move and how objects look from various angles. This isn't always possible unfortunately (unless you're an expert at stalking people), but when possible it's highly recommended.
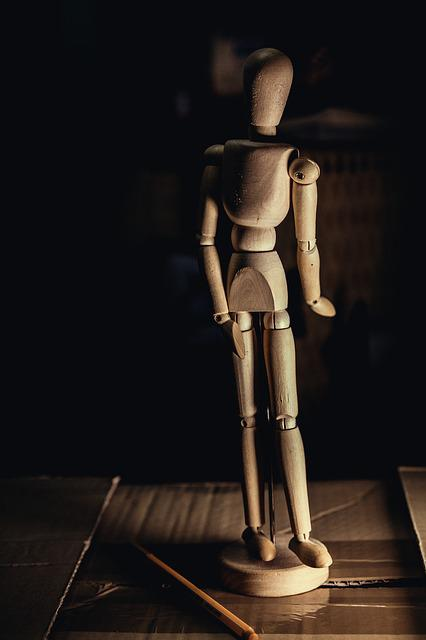
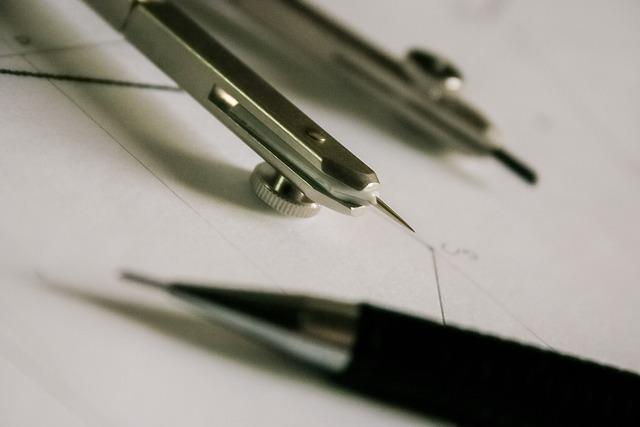
Tip 4: Proportions
- Proportions: the relationship of one thing to another in terms of size or ratio.
Basically, this means making sure things look the way they're supposed to and not wonky. For instance, if I were drawing a sphere, I would want all the edges to be perfectly round and even–not longer on one side with a random bump on the other end. if my proportions were correct, I could measure from the top to the bottom of my sphere, and then from right to left and get the exact same measurement, making a perfect sphere.
Proportions apply to everything we draw from a can of soup to a galloping horse. If you have a leg that looks too long, you can compare its length to the length of the head and neck, then make the same comparison on your drawing. Once you get the hang of it, proportions is one of the handiest tools in an artist's tool box. This is how artists measure with a pencil, and it is especially helpful when drawing (or painting) from life.
When you take a ratio to compare proportions, do it more than once to make sure it is accurate. I can't tell you how many times I've neglected to double-check my ratios and had to re-do something because of it.
Taking proportions, (or measuring with a pencil if you are using a pencil), takes a little bit of getting used to at first. I always have my students practice on a simple can from the grocery store first, which tends to have a 1:2 ratio of width to height. Then they draw that same can however large or small they want on their paper, as long as it maintains that 1:2 ratio.
This helpful skill can help your measure and take proportions from large sections to smaller details. It is an invaluable technique to know-especially when it comes to drawing.
Tip 5: Practice, Practice, Practice
As many great men and women of the past have expressed in different words, and as Van Gogh himself said, "What would life be if we had no courage to attempt anything?"
There is no such thing as a perfect piece of artwork. Any artist will admit that. If you expect to learn how to draw amazingly well in your first hour, first day-even your first week–you will probably be disappointed.
Drawing, as with all art, is about consistency. One of my teachers often compared art to running a marathon. You practice and train for months before ever attempting your first marathon. Many professionals refer to this as, "putting in the miles." That means failure. And persistence. And determination. And hope.
Set yourself an end goal. It will probably change at some point, but for now, write down your top 3 artists you want to emulate, and print out or download a few of their pieces to study and reference as you draw. Try to find out their process and methods for how they create their work, and practice those things yourself. Then set a goal for how much time you want to spend each week working towards that goal. I've said this before, but it bares repeating: save your old work! It's so encouraging to look back a few months later and see how far you've come! (And maybe laugh at yourself a little too).
Lastly, find a friend or mentor with at least an amateur knowledge of art principles who you are comfortable critiquing your work. Make sure it is constructive criticism! You are your own worst critic, and you don't need another one. Look for someone who will be both encouraging and still offer valuable suggestions with which you can improve. The internet has opened up our little art worlds to a literal global audience. Find someone you admire and ask them to be your mentor. The worst thing they can say is no, so why not try it?
Conclusion
Drawing is a fun and rewarding skill that can be learned by anyone who is willing to put in the time and effort. Yes, that includes you! It is also a great way to express ourselves, bring attention to important topics, and create enjoyment for others. In my humble opinion, it is one of the best jobs on the planet because we get to do what we love and bring attention to God's beautiful creation that He made for us to enjoy. Too often we get glued to screens or stuck in the air conditioning rather than enjoying the incredible world outside, the mundane objects lying around the house, or the precious people we walk by everyday. Your art is important! Don't underestimate your calling. Keep improving and striving to be the best in your field that you can be. I hope your found these 5 basic drawing tips helpful, and that they will help you to get out there and start drawing!
Want to learn more?
If you enjoyed this article and would like to learn more about the drawing process, sketching tips, and all things art related, then sign up for our newsletter! Inside our special artist's group, you'll receive new post notifications, answers to your top art questions, and early access to new, original artwork and courses that I'm creating. Don't forget to follow me on social media and drop me an email if I can help you in any way. : )